
Back to home page
Back to photography main page
Back to equipment page
Combined to the sink, it makes the long lab hours more agreable.
From left to right:
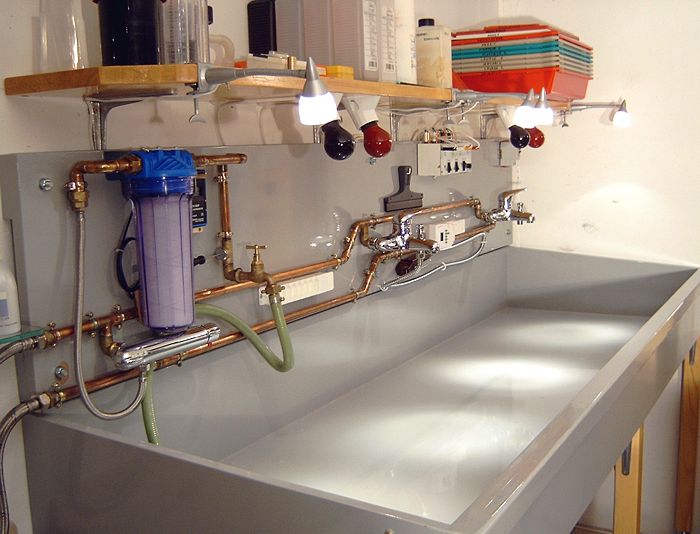

Except the thermometer which is really a precision model (Greisinger GTH175/ MOP, precision of 0.1°C), the other hardware is easily available in large hardware stores (for our french friends, at Bricorama ...)

The flat screen for my lab software.

The box at the upper right corner is the switch for the red and amber safelights (230V) and the white lights, 12V halogens.

We may not see that much the small box at the upper right corner, but it is absolutely
essential: it is the GFI circuit breaker, the kind you have in bathrooms (it breaks
the circuit if a very small amount of current goes to ground), that may save
your life if you're to generous with the shower when cleaning the sink and water
reaches the electrical plugs ...
The model shown is normally used in closets and has apparent
electrical contacts. You must absolutely hide them, I've used transparent silicone
caulking to cover them.
Another security aspect: all copper tubes should be electrically connected
and grounded to earth.
In my example, the filter housing is made of plastic, which is an insulator, so,
a thick copper wire should connect both tubes before and after the filter
housing.
The panel is made similarly to the sink: MDF
wood impregnated with outdoor varnish and covered with several layers of
heavy-duty bi-component polyurethane paint normally used for garage floors.
This water panel signs my great first appearance in the plumbing world ...

The various tools needed for the welding:

Parts positioning and measure of the tubes lengths

Tube cutting tool. Turning the knob presses the disk knives onto the tube. Rotate the tool around the tube, turn the knob once more, ... and so on several times to cut it precisely.

Clean the tube and fitting with the sandpaper, apply the scouring liquid and mount the tube onto the fitting.

Heat the assembly with the torch and apply the tin wire on the junctions of
the parts.
The parts must be heated enough so that the tin melts and penetrates by
capillarity between the tube and fitting.
Do not melt the tin wire with the torch, the heat of the fittings should be
enough.

The parts welded together.

The electrical wiring on the back of the pannel.